Fishing is a great hobby to get into, no matter the time. It’s inexpensive, easy to learn, and it gives you another fantastic reason to explore the great outdoors. Assuming you eat what you catch, fish can also provide you with an excellent source of quality protein and fat. But before you try and catch your first fish, learn the steps to get started, including basic terms and equipment you’ll need, in our fishing guide for beginners.
1. Buy A Fishing License
The first step in your fishing adventure should be to buy a state fishing license. They’re usually inexpensive (~$25 per year) and easy to get. You can buy one online at TakeMeFishing.org or the U.S Fish & Wildlife Service, or local fishing tackle shops and designated convenience stores.
Whenever you go fishing, make sure you bring your license with you and keep it on you while you’re fishing at all times. Fishing without a license is punishable by fines up to $250 and/or 15 days in jail. Also, always make sure the area you choose to fish permits it, as some parks and designated areas prohibit fishing.
Now that you’ve got your license, let’s go over the basics of the type of gear you’ll want to bring with you on your trip. Of course, it all starts with a fishing rod, reel, and line.
2. Grab Your Rod and Reel
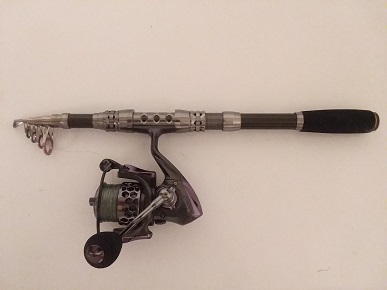
Generally, it’s best to start with a fishing rod and reel combo if you’ve never fished before. Many reels and rods are sold separately, but in a combo, they’re sold together and usually much easier to set up. Check out The Best Beginner Fishing Rod for a great review of some of the best fishing rods for beginners. You can also visit your local tackle shop or a convenience store that sells fishing equipment and talk to an employee about buying a rod and reel that’s right for you.
3. Choose Your Fishing Line
When deciding on the type of fishing line to choose, there are three main varieties:
- Monofilament is usually the best option for beginners, due to its low cost, adversity to getting tangled on the reel and the ease of tying knots
- Fluorocarbon is more abrasion-resistant. It’s also less visible to fish than monofilament but much stiffer, which makes it more susceptible to tangling, especially if your reel is over-spooled.
- Braided line is smaller in diameter than both fluorocarbon and monofilament, which allows you to put more line on your spool. Braided line also makes it easier to cast longer distances. It’s very stretch resistant, allowing you to feel lighter bites and making it easier to drive the hook into the fish’s mouth. Using this type of line, however, makes tying knots difficult for a beginning fisher. Like fluorocarbon, it tangles quite easily, making monofilament a better overall choice for a beginner.
Fishing line also comes in different strengths, called the pound test. Pound test is a measurement of how much stress the line can take before it breaks. The larger the number, the stronger the line.
Lower pound test is best used for smaller fish and while fishing in open water. A higher pound test is needed when fishing for larger fish and when fishing in heavy cover. Choose monofilament line in the 2-6lb test range for a great beginner setup.
Read More: Fly Fishing First-Timer’s Guide
4. Choosing Your Hooks
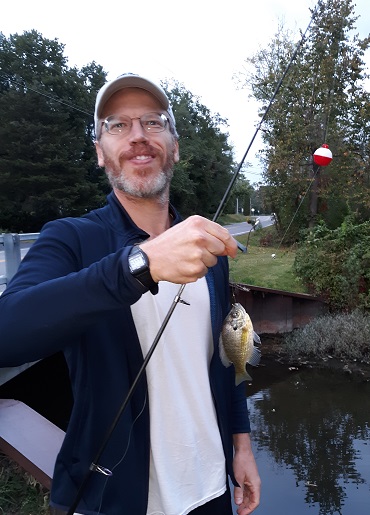
Since smaller fish like bluegill are great for beginners to gain experience with, you’ll want to buy smaller hooks rather than large ones because these fish have smaller mouths. One important thing to remember about hook sizes is that the higher the number, the smaller the hook.
So, for example, a size 6 hook is bigger than a size 10 but smaller than a size 2. Also notice that sizes are all in even numbers, except size 1. As the hook size increases past 1, measurements change to aughts, written 1/0, 2/0, etc. As these numbers get higher, the hook size gets larger. So, size 2/0 is larger than 1/0 and smaller than 3/0. Stick with smaller hooks for now, and stay within the 6-10 range.
Fishing hooks also come in many styles:
- Baitholder hooks are best when using live bait, such as worms. It’s best because this type of hook has two barbs on the shank (the long, straight part of the hook) to help secure the bait.
- Circle hooks are also bait friendly, and fish rarely swallow the hook. One significant difference is that with circle hooks, you do not have to set the hook.
- Aberdeen hooks have a longer shank and are slimmer from hook to shank, making it easier to remove the hook from the fish. These tend to work best when fishing for bluegill. The easy removal of the hook makes them great for beginners to use.
5. Choosing Your Bobbers
When it comes to bobbers, it’s best to keep it simple. Smaller ones for smaller fish, larger ones for larger fish. A small bobber offers less resistance against the fish when it bites and is more sensitive, so you can see and feel the bite better on your line.
Many beginners make the mistake of buying bobbers that are too big. The classic round, red and white, clip-on bobbers are easy to attach to the line and are an excellent choice for beginners. Another type of bobber, the slip bobber, slides up and down the line and can help you reach greater depths in the water.
6. Don’t Forget Your Sinker!
Lastly, you’ll want to buy some sinkers to attach to your line so your bait will sink nicely. Traditionally, sinkers were made of lead. Now, however, small lead sinkers under ½-oz can no longer be sold in some states.
There are more eco-friendly options now made from other materials such as tin, tungsten, and steel. When lead sinkers are lost, fish and other wildlife can mistakenly swallow them and be poisoned, so it’s always best to buy lead-free sinkers.
Just like with bobbers, aim small. The lighter the weight, the less resistance the fish feels when biting it. Small split shot sinkers, which easily clip on and off your line, are another great choice when buying equipment for the first time.
7. Go Out & Cast!
Once you have all of your gear and bait on the line, your last step for fishing as a beginner is casting, which is simple with a little practice.

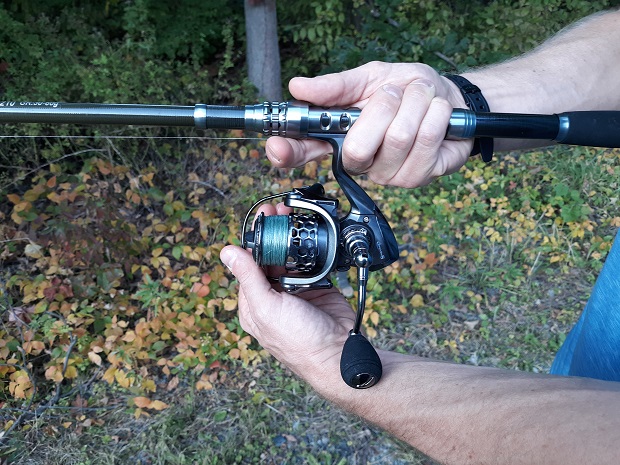
Step 1: Hold the rod and reel between your fingers and use your index finger to hold the line against the rod
- Hold the rod, so the reel is between your fingers and then use your index finger to hold the line against the rod.
- Once the line is secure, open the bail of the reel with your other hand.
- Now, raise the rod up or to the side and flick the rod using your elbow and wrist, letting go of the line about halfway through your motion to cast your line toward the intended target.
- Close the bail when your cast is complete. With practice, you’ll be able to hit your target every time!
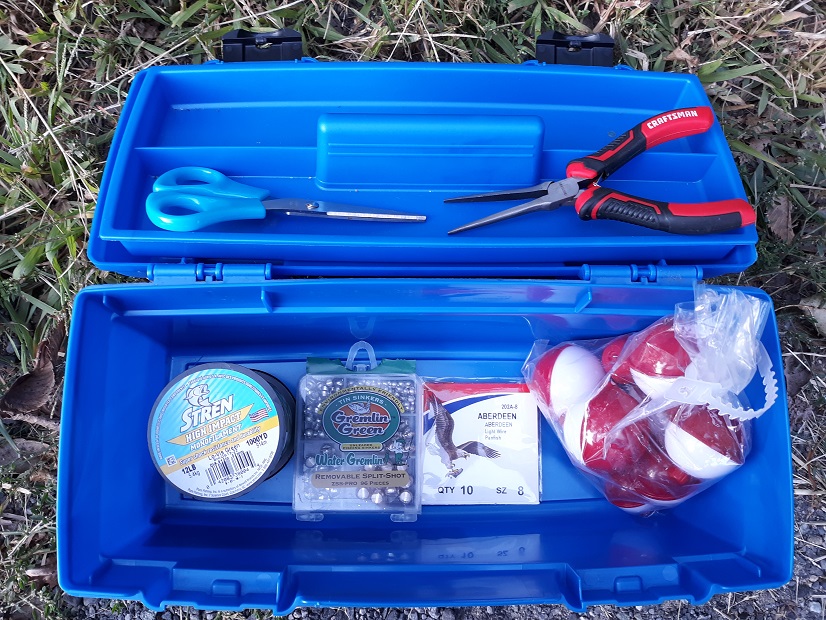
Don’t forget to buy a small, sturdy tackle box to store all of the equipment mentioned above. Also, remember to bring needle-nose pliers for bending and taking swallowed and hard to release hooks out, scissors for cutting line, and a first-aid kit. Bluegill and other fish have sharp fins that can cause a minor cut on your hand, and hooks can sometimes hook you by accident, so it’s better to have a first-aid kit to be safe.
Good luck and remember always to fish responsibly!
What tips would you recommend while fishing for beginners? Let us know in the comments below!
Read Next:
Favorite Fall Patterns For Fly Fishing Western Streams In The U.S.
The Best Places For Fly Fishing In The U.S.
Gone Fishing, British Columbia
It’s awesome that a fishing license is about $25 a year and then you can go fishing whenever you feel like it! My dad wants to take me fishing for the first time and I decided I better do it right. I’ll make sure I get all the right gear and a license so that I’m prepared.
It is definitely an affordable license compared to a few other sports! I would recommend looking at your state and local regulations before fishing since some states have restrictions on certain species of fish you can catch, how many you’re allowed to take, and when you can fish throughout the year. That’s great that you’re getting prepared. I hope you and your dad have a great time!!